由于一些特殊原因,部分地区无法流畅的访问GitHub,导致安装Stable Diffusion十分的麻烦,特此记录安装过程。
电脑为windows系统,处理器为12th Gen Intel(R) Core(TM) i7-127002.10 GHz,内存(RAM): 32.0 GB,6G独立显存,刚好达到门槛。
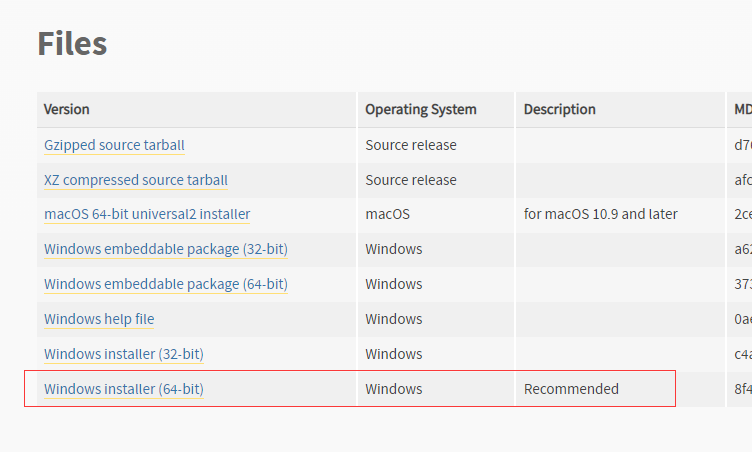
1. 首先前往python官网安装python3.10.6
在这里有两个注意事项,第一点是python的3.10版本只允许安装一种,比如说你之前在电脑上安装过了python3.10.5,那么python3.10.6是无法安装的,需要先卸载;第二点是如果你之前在电脑上安装了任意的python3版本,请将该python版本路径从环境变量中移除,移除方法如下
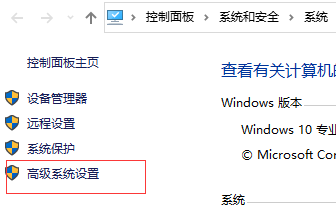
- 先进入我的电脑,右键属性,再选择高级系统设置
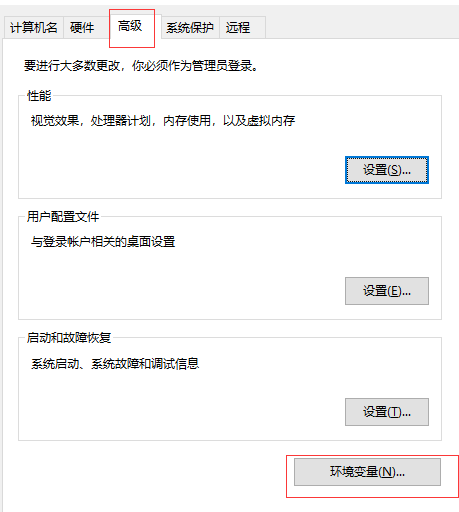
- 选择 高级 下的 环境变量
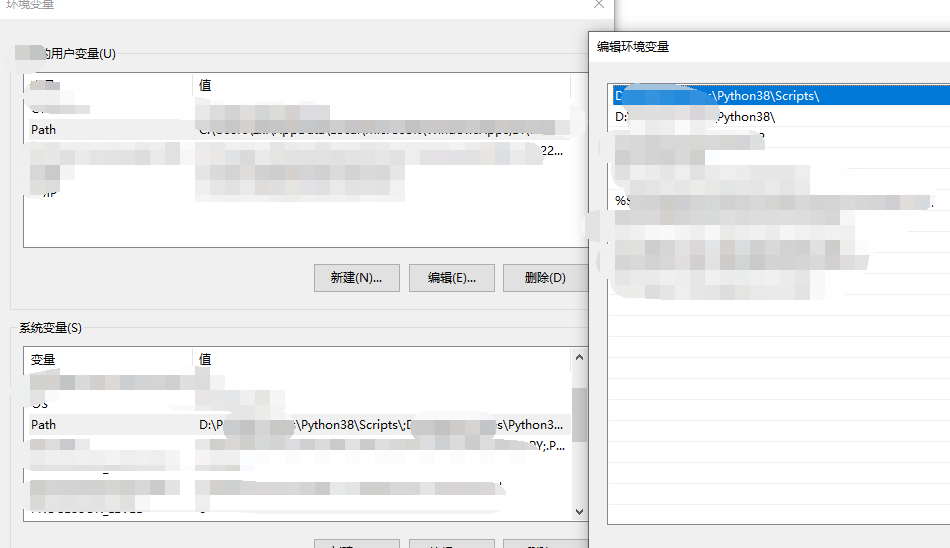
- 选择用户变量或者系统变量下的Path,我的python路径是在系统变量下,双击Path后再次选择python的路径进行删除即可。
为了说明可能出现的问题,我先不移除之前的python3 版本环境变量,选择直接安装python 3.10.6,请务必记得勾选python加入环境变量。

2. python安装好之后,进行第二步,安装Git,windows下安装Git的快捷方式
winget install --id Git.Git -e --source winget
3. 克隆WEB-UI项目。前往你的用户目录,例如我的用户目录为
C:\Users\abc
那么打开命令行,输入如下代码(当然,一般情况下打开命令行窗口默认就在用户级别目录)
cd C:\Users\abc
开始拉取项目,键入如下代码
git clone https://github.com/AUTOMATIC1111/stable-diffusion-webui.git
返回内容如下
Cloning into 'stable-diffusion-webui'...
remote: Enumerating objects: 21535, done.
remote: Counting objects: 100% (148/148), done.
remote: Compressing objects: 100% (86/86), done.
remote: Total 21535 (delta 79), reused 102 (delta 62), pack-reused 21387
Receiving objects: 100% (21535/21535), 29.97 MiB | 9.62 MiB/s, done.
Resolving deltas:  60% (9056/15092)
Resolving deltas: 100% (15092/15092), done.
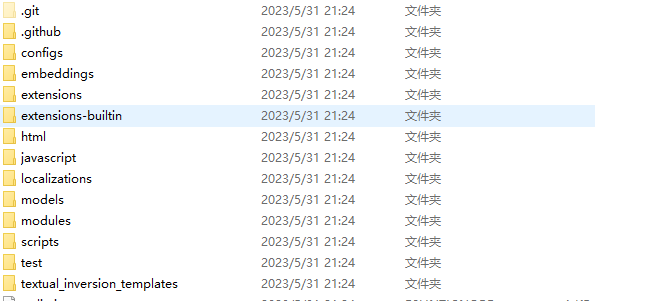
现在我们可以看到C:\Users\abc目录下面有一个stable-diffusion-webui文件夹了
![]()
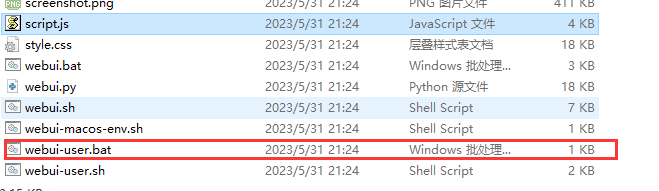
打开文件夹后,我们可以看下里面没有名为venv的目录,待会就会因为python路径的问题开始报错了,先截图记录
4. 前往下载Stable Diffusion 模型文件v1-5-pruned-emaonly.ckpt,这个文件有4个G,所以需要多一点耐心来下载。
下载完成之后,我们把这个ckpt模型文件丢到之前的stable-diffusion-webui文件夹下的models文件夹下的Stable-diffusion文件夹,该文件夹下有一个txt文件,名为Put Stable Diffusion checkpoints here.txt
# 模型放置路径
stable-diffusion-webui\models\Stable-diffusion

5. 安装WEB-UI。这一步是最麻烦的,因为涉及到很多库的安装,如果你的网络访问Githup很流畅的话,那么你可以直接打开根目录(即之前在第三部创建的文件夹stable-diffusion-webui),找到webui-user.bat,直接双击安装就可以了。
我先直接选择安装,首先报出了一个INCOMPATIBLE PYTHON VERSION的提醒
INCOMPATIBLE PYTHON VERSION

This program is tested with 3.10.6 Python, but you have 3.8.4.
If you encounter an error with "RuntimeError: Couldn't install torch." message,
or any other error regarding unsuccessful package (library) installation,
please downgrade (or upgrade) to the latest version of 3.10 Python
and delete current Python and "venv" folder in WebUI's directory.

You can download 3.10 Python from here: https://www.python.org/downloads/release/python-3106/

Alternatively, use a binary release of WebUI: https://github.com/AUTOMATIC1111/stable-diffusion-webui/releases

Use --skip-python-version-check to suppress this warning.
随后安装报错,所以,我们需要去移除之前的python3.8版本,并重启CMD窗口(一定要重启),再次键入python
Python 3.10.6 (tags/v3.10.6:9c7b4bd, Aug  1 2022, 21:53:49) [MSC v.1932 64 bit (AMD64)] on win32
Type "help", "copyright", "credits" or "license" for more information.
返回上面的信息证明我们已经切换了python版本,心急的朋友这时候肯定就直接运行webui.bat了,结果发现报错提示还是一样:INCOMPATIBLE PYTHON VERSION。
由于我们刚刚已经运行过了一次webui-user.bat,Stable Diffusion自动为我们安装了一个python3.8版本的虚拟环境,还记得我们上面提到的venv文件夹吗?打开venv\Scripts我们可以看到确实存在pip3.8.exe等文件,因此,我们此时删除掉venv文件夹,再次双击webui-user.bat运行就可以了。
如果出现网络下载慢或者time out的问题,可以用一点技巧。首先我们进入根目录(即之前在第三部创建的文件夹stable-diffusion-webui),找到launch.py文件,里面的内容大概如下:
from modules import launch_utils


args = launch_utils.args
python = launch_utils.python
git = launch_utils.git
index_url = launch_utils.index_url
dir_repos = launch_utils.dir_repos

commit_hash = launch_utils.commit_hash
git_tag = launch_utils.git_tag

run = launch_utils.run
is_installed = launch_utils.is_installed
repo_dir = launch_utils.repo_dir

run_pip = launch_utils.run_pip
check_run_python = launch_utils.check_run_python
git_clone = launch_utils.git_clone
git_pull_recursive = launch_utils.git_pull_recursive
run_extension_installer = launch_utils.run_extension_installer
prepare_environment = launch_utils.prepare_environment
configure_for_tests = launch_utils.configure_for_tests
start = launch_utils.start


def main():
    if not args.skip_prepare_environment:
        prepare_environment()

    if args.test_server:
        configure_for_tests()

    start()


if __name__ == "__main__":
    main()
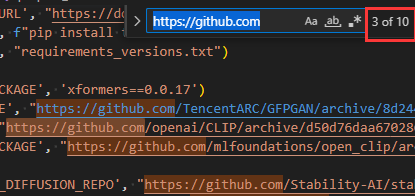
我们再选择顶部的launch_utils,进入定义(快捷键F12),这个文件实际就是stable-diffusion-webui\modules文件夹下的launch_utils.py,我们再在该文件下搜索https://github.com,可以看到存在10个类似的网址
我们将其统一替换成https://ghproxy.com/https://github.com,即在每个https://github.com网址前添加“https://ghproxy.com/”字符串
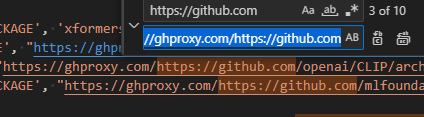
更正如下:
这一步如果下载速度太慢,直接修改pip安装源地址即可。
- 创建pip.ini文件
win+R,输入%APPDATA%,创建pip文件夹,在pip文件夹中创建pip.ini,以utf-8编码格式保存
- 编辑pip.ini
[global]
index-url=http://mirrors.aliyun.com/pypi/simple/
trusted-host= mirrors.aliyun.com
- 配置环境变量
PIP_CONFIG_FILE:%APPDATA%\pip\pip.ini;
![]()
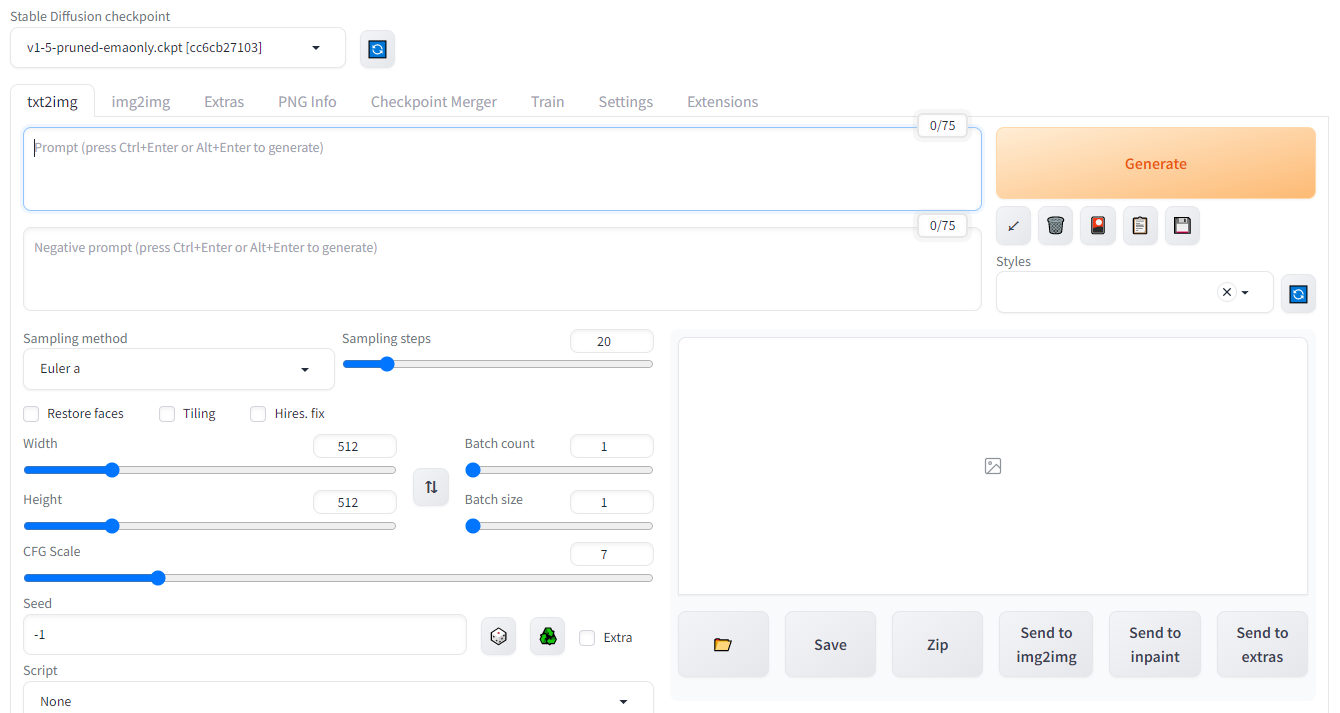
再次双击webui-user.bat运行就会发现下载速度基本上可以跑到正常的带宽了,即使如此,由于要安装的库过大,这一步也基本上要花上半个小时,所以只要没报错,那么就慢慢等待,当你看到Running on local URL: http://127.0.0.1:7860 这串代码,就证明安装成功了:
顺便贴上运行的代码如下,
Python 3.10.6 (tags/v3.10.6:9c7b4bd, Aug  1 2022, 21:53:49) [MSC v.1932 64 bit (AMD64)]
Version: v1.3.0
Commit hash: 1aefaa8ef123c31aa3fd41sdasd7asdc213a
Installing torch and torchvision
Looking in indexes: https://pypi.org/simple, https://download.pytorch.org/whl/cu118
Collecting torch==2.0.1
  Downloading https://download.pytorch.org/whl/cu118/torch-2.0.1%2Bcu118-cp310-cp310-win_amd64.whl (2619.1 MB)
     ---------------------------------------- 2.6/2.6 GB 2.2 MB/s eta 0:00:00
Collecting torchvision==0.15.2
  Downloading https://download.pytorch.org/whl/cu118/torchvision-0.15.2%2Bcu118-cp310-cp310-win_amd64.whl (4.9 MB)
     ---------------------------------------- 4.9/4.9 MB 10.9 MB/s eta 0:00:00
Collecting jinja2
  Downloading https://download.pytorch.org/whl/Jinja2-3.1.2-py3-none-any.whl (133 kB)
     ---------------------------------------- 133.1/133.1 kB 7.7 MB/s eta 0:00:00
Collecting typing-extensions
  Downloading typing_extensions-4.6.2-py3-none-any.whl (31 kB)
Collecting filelock
  Downloading filelock-3.12.0-py3-none-any.whl (10 kB)
Collecting networkx
  Downloading networkx-3.1-py3-none-any.whl (2.1 MB)
     ---------------------------------------- 2.1/2.1 MB 1.1 MB/s eta 0:00:00
Collecting sympy
  Downloading sympy-1.12-py3-none-any.whl (5.7 MB)
     ---------------------------------------- 5.7/5.7 MB 2.8 MB/s eta 0:00:00
Collecting requests
  Downloading requests-2.31.0-py3-none-any.whl (62 kB)
     ---------------------------------------- 62.6/62.6 kB ? eta 0:00:00
Collecting pillow!=8.3.*,>=5.3.0
  Downloading Pillow-9.5.0-cp310-cp310-win_amd64.whl (2.5 MB)
     ---------------------------------------- 2.5/2.5 MB 3.9 MB/s eta 0:00:00
Collecting numpy
  Downloading numpy-1.24.3-cp310-cp310-win_amd64.whl (14.8 MB)
     ---------------------------------------- 14.8/14.8 MB 4.0 MB/s eta 0:00:00
Collecting MarkupSafe>=2.0
  Downloading https://download.pytorch.org/whl/MarkupSafe-2.1.2-cp310-cp310-win_amd64.whl (16 kB)
Collecting certifi>=2017.4.17
  Downloading certifi-2023.5.7-py3-none-any.whl (156 kB)
     ---------------------------------------- 157.0/157.0 kB 2.4 MB/s eta 0:00:00
Collecting charset-normalizer<4,>=2
  Downloading charset_normalizer-3.1.0-cp310-cp310-win_amd64.whl (97 kB)
     ---------------------------------------- 97.1/97.1 kB 2.8 MB/s eta 0:00:00
Collecting idna<4,>=2.5
  Downloading https://download.pytorch.org/whl/idna-3.4-py3-none-any.whl (61 kB)
     ---------------------------------------- 61.5/61.5 kB ? eta 0:00:00
Collecting urllib3<3,>=1.21.1
  Downloading urllib3-2.0.2-py3-none-any.whl (123 kB)
     ---------------------------------------- 123.2/123.2 kB 400.7 kB/s eta 0:00:00
Collecting mpmath>=0.19
  Downloading mpmath-1.3.0-py3-none-any.whl (536 kB)
     ---------------------------------------- 536.2/536.2 kB 1.4 MB/s eta 0:00:00
Installing collected packages: mpmath, urllib3, typing-extensions, sympy, pillow, numpy, networkx, MarkupSafe, idna, filelock, charset-normalizer, certifi, requests, jinja2, torch, torchvision
Successfully installed MarkupSafe-2.1.2 certifi-2023.5.7 charset-normalizer-3.1.0 filelock-3.12.0 idna-3.4 jinja2-3.1.2 mpmath-1.3.0 networkx-3.1 numpy-1.24.3 pillow-9.5.0 requests-2.31.0 sympy-1.12 torch-2.0.1+cu118 torchvision-0.15.2+cu118 typing-extensions-4.6.2 urllib3-2.0.2

[notice] A new release of pip available: 22.2.1 -> 23.1.2
[notice] To update, run: C:\Users\abc\stable-diffusion-webui\venv\Scripts\python.exe -m pip install --upgrade pip
Installing gfpgan
Installing clip
Installing open_clip
Cloning Stable Diffusion into C:\Users\abc\stable-diffusion-webui\repositories\stable-diffusion-stability-ai...
Cloning Taming Transformers into C:\Users\abc\stable-diffusion-webui\repositories\taming-transformers...
Cloning K-diffusion into C:\Users\abc\stable-diffusion-webui\repositories\k-diffusion...
Cloning CodeFormer into C:\Users\abc\stable-diffusion-webui\repositories\CodeFormer...
Cloning BLIP into C:\Users\abc\stable-diffusion-webui\repositories\BLIP...
Installing requirements for CodeFormer
Installing requirements
Launching Web UI with arguments:
No module 'xformers'. Proceeding without it.
Calculating sha256 for C:\Users\abc\stable-diffusion-webui\models\Stable-diffusion\v1-5-pruned-emaonly.ckpt: Running on local URL:  http://127.0.0.1:7860

To create a public link, set `share=True` in `launch()`.
Startup time: 7.0s (import torch: 1.6s, import gradio: 1.8s, import ldm: 0.6s, other imports: 1.9s, setup codeformer: 0.1s, load scripts: 0.6s, create ui: 0.3s).
cc6cb27103417325ff94f52b7a5d2dde45a7515b25c255d8e396c90014281516
Loading weights [cc6cb27103] from C:\Users\abc\stable-diffusion-webui\models\Stable-diffusion\v1-5-pruned-emaonly.ckpt
Creating model from config: C:\Users\abc\stable-diffusion-webui\configs\v1-inference.yaml
LatentDiffusion: Running in eps-prediction mode
DiffusionWrapper has 859.52 M params.
Failed to create model quickly; will retry using slow method.
LatentDiffusion: Running in eps-prediction mode
DiffusionWrapper has 859.52 M params.
Downloading (…)olve/main/vocab.json: 100%|██████████████████████████████████████████| 961k/961k [00:00<00:00, 1.57MB/s]
Downloading (…)olve/main/merges.txt: 100%|██████████████████████████████████████████| 525k/525k [00:00<00:00, 1.23MB/s]
Downloading (…)cial_tokens_map.json: 100%|████████████████████████████████████████████████████| 389/389 [00:00<?, ?B/s]
Downloading (…)okenizer_config.json: 100%|████████████████████████████████████████████████████| 905/905 [00:00<?, ?B/s]
Downloading (…)lve/main/config.json: 100%|████████████████████████████████████████████████| 4.52k/4.52k [00:00<?, ?B/s]
Downloading pytorch_model.bin:  78%|████████████████████████████████████          | 1.34G/1.71G [01:57<00:33, 11.1MB/s]
PS:
可能会遇到的问题,如果你的电脑没有GPU,或者是笔记本的集成显卡,那么需要修改一下webui-user.bat文件
原始文件内容如下
@echo off

set PYTHON=
set GIT=
set VENV_DIR=
set COMMANDLINE_ARGS=

call webui.bat
修改后如下
@echo off

set PYTHON=
set GIT=
set VENV_DIR=
set COMMANDLINE_ARGS=--skip-torch-cuda-test

call webui.bat
如果在已经打开了Stable Diffusion得情况下仍然报错,提示RuntimeError: "LayerNormKernelImpl" not implemented for 'Half',那么可以继续修改改文件,添加--precision full --no-half
@echo off

set PYTHON=
set GIT=
set VENV_DIR=
set COMMANDLINE_ARGS=--skip-torch-cuda-test --precision full --no-half

call webui.bat
最新版的Stable Diffusion v1.7 如果有这个错误
starlette.websockets.WebSocketDisconnect: 1001
继续加参数即可:
set COMMANDLINE_ARGS=--no-gradio-queue